Content Creators, PayPal, and Protecting Your Money
Posted by SCRUNT on May 22nd 2023
So you're a content creator, and you're using or want to use PayPal to facilitate the sending and receiving of money. Great!
You may have heard stories of other creators that have had poor experiences with PayPal, in particular, having their PayPal account frozen or forcibly closed while the creator had money within their PayPal account. This is not ideal, as it can take a while before you can withdraw your money from PayPal if your account gets frozen or forcibly closed (upwards of 180 days).
So, should you not use PayPal in order to avoid this potential situation? Not necessarily, but there are some things you can do to protect your money as much as possible while using PayPal as a convenient platform to send and receive payments.
All opinions given below are only the opinion of GET SCRUNTED and should in no way be used or construed as legal advice or legal council. GET SCRUNTED highly recommends speaking with legal council before taking any action that involves your money in ANY WAY.
PayPal is NOT a Bank..
This may seem obvious, but it's worth mentioning that PayPal is NOT a bank. PayPal is a privately owned company. As such, PayPal is under no obligation to play by the same rules that banks must abide by. They can also choose to apply their will as they see fit, and sometimes, it seems like they target certain accounts unfairly and provide no recourse.
Step 1: Open a Checking Account with a Bank
Assuming that you already have an PayPal account, you'll want to connect your PayPal account to your checking account. If you don't already have a checking account with an established bank, you're going to want to open one.
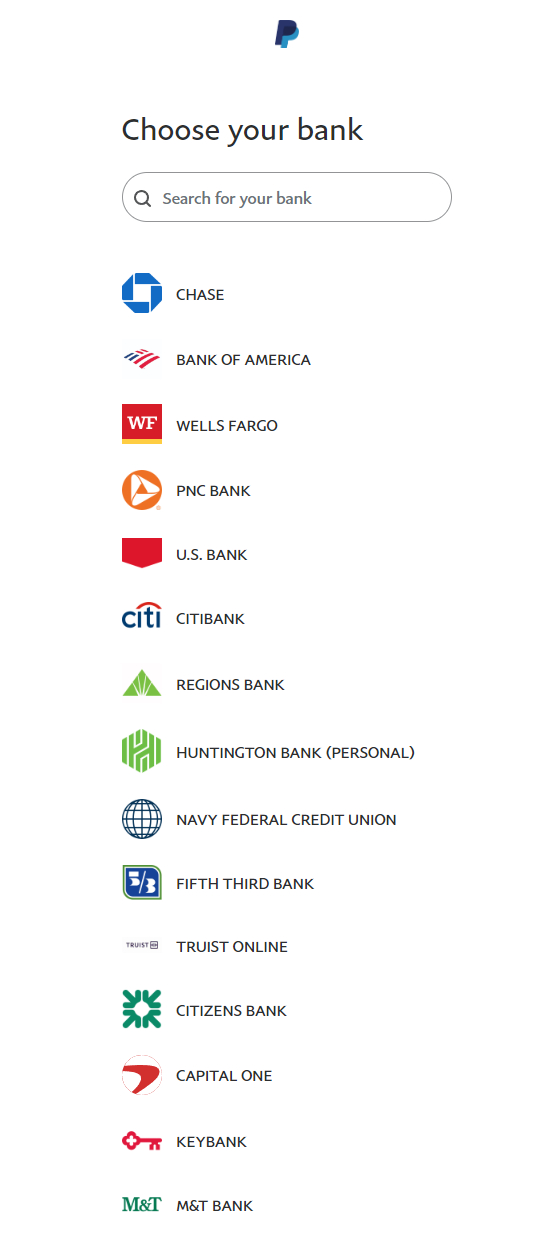
If you need to open a checking account with a bank, it's highly recommended that you choose from one of the banks that PayPal has native integrations with because you'll be able to very easily connect your bank account with PayPal.

If you need to open a new bank account, it's highly recommended that you open a Checking Account specifically. Savings Accounts are great for saving money, but there are usually fees associated with withdrawing money from them too often.
When talking to your bank of choice, be sure to ask about any potential fees that might affect you and your Checking Account. Some common things to ask about are Minimum Balance Requirements, Maintenance Fees, and Overdraft Fees. It's highly recommended that you do not open a Checking Account that requires a Minimum Balance, as you never know how much money you might need at one time if you're caught in a pinch. It's highly recommended that you do not open a Checking Account that has a Maintenance Fee either, as that's basically a monthly bill, no matter how small it is. Overdraft Fees are pretty unavoidable, but if you can find a bank that doesn't charge too much or has some sort of system to refund or forgive Overdraft Fees if they're taken care of fast enough, that's ideal.
If you're in school, you may be able to open a Student Checking Account depending on if your bank has the option. Student Checking Accounts may have benefits over standard Checking Accounts, so be sure to ask about the differences if you're eligible and if your bank has the option.
Step 2: Connect your Checking Account to PayPal
This is pretty easy and straight forward as long as you've chosen a bank that PayPal is already integrated with. You can find a guide on PayPal's website on how to connect your Checking Account to your PayPal.
https://www.paypal.com/us/cshelp/article/how-do-i-link-a-bank-account-to-my-paypal-account-help183
Step 3: Setup Automatic Transfers to your Checking Account
This is the step that I don't see enough people talking about. PayPal has a feature that will AUTOMATICALLY transfer ALL FUNDS from your PayPal account to your Checking Account for FREE at the interval of your choice.
The only caveat is that you must have a Business PayPal account in order to use this feature.
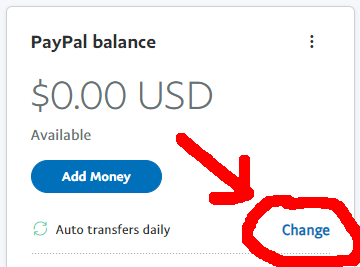
Under your PayPal balance there should be a More Options button visible. Click it, select your Checking Account, set the frequency of transfer, the amount you want transferred, and then click Turn On Automatic Transfers.

I am of the opinion that the best way to setup your automatic transfers is Daily and for the Entire Balance. This minimizes the amount of money that is held in your PayPal Balance at any given time to one day. If your PayPal account gets frozen or forcibly closed, the only money that will get held is one day's worth. That being said, you can opt to "Leave a Minimum Balance" in your PayPal Account should you want to keep at least a certain amount of money available in your PayPal Balance at any given time.

If you receive a particularly large payment for your work (go you by the way!), I personally would even go so far as to manually transfer your balance to your bank account immediately.
If you DO NOT have a PayPal Business Account
If you don't have a PayPal Business account, it's probably a good idea to get one. As a content creator, if you're sending and receiving money in a manner that constitutes "business" no matter how small your "business" is, it's probably in your best interest to have a PayPal Business Account. In order to convert your Personal PayPal account to a Business PayPal account:
- Click your name at the top right corner of the page
- Click "Account Settings" in the dropdown menu
- On the left menu bar on screen, select "Account Preferences"
- Under "Account Type" there should be a button to switch your account to Business
- Fill out the needed information in order to convert your account to Business
If you do not have a PayPal Business account, and for whatever reason you do not want to or cannot open a PayPal Business account, you may be able to contact PayPal Customer Service to enable a hidden setting called "Auto Sweep" which will accomplish the same thing. This is not guaranteed to still be an available option, and the last I've heard, it's only a possibility to enable if you're located in the USA under certain conditions. That being said, if you want to try, the following link has a great walkthrough on what to do.
https://onlinesellingexperiment.com/paypal-automatic-transfers/
And that's it! You're money now gets sent to your bank account automatically!
You may be wondering if it's worth it to keep some amount of money in your PayPal Balance in order to pay for things, and I personally don't think that's necessary.
With your Checking Account connected to your PayPal, you can still make payments that are just withdrawn from your Checking Account instead of your PayPal Balance. You can even add debit and credit cards to your PayPal account in order to pay for things instead of using your PayPal Balance.
The only potential downside to transferring your PayPal Balance to your Checking Account is that it can take 3-5 business days for the money to be withdrawn from your PayPal Balance to then show up in your Checking Account. Within that time, your money is not usable as it's not in your PayPal Balance and is not yet available in your Checking Account.
Whether you decide to keep some amount of money in your PayPal Balance or if you transfer all your money to your Checking Account everyday, hopefully this helps you protect the money that you've earned through your Content Creation.
Best of luck to you and your endeavors! Hopefully you never have problems with PayPal, but if you do, I sincerely hope this helps.
SCRUNT